Allow RDP permission on Windows Server 2019 for a additional user.
When we set up a new Windows Server, a default Administrator account is created for us. While this is fine initially, you should always create a separate user for day to day purposes. In this tutorial, you will learn how to create a new user in Windows Server 2019 and allow it to use RDP (Remote Desktop Protocol).
Prerequisites
- A VPS or Dedicated Server with Windows Server 2019 installed.
- You must be logged in via RDP as an administrative user. If you are on Windows 10, you can follow our guide on how to connect to your server using RDP.
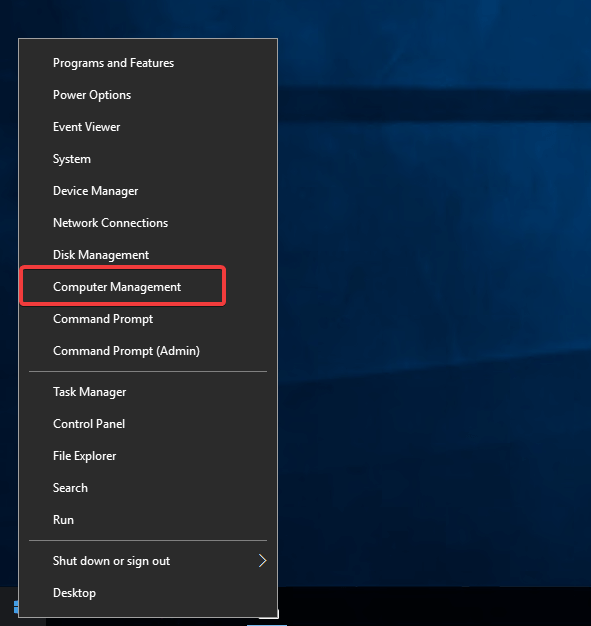
Step 1: Create a User
Right-click on the Start menu and click on>> Computer Management
Expand the Local Users and Groups option and click on Users

Right-click and select >>New User
Now fill in the details of the new user account you want to create. Disable the User must change password at next logon
option and enable the
option so you can use your password without being reminded constantly by Windows to change it.

Click Create to finish adding the new user. Remember the username you chose here because you will need it later!
allow RDP permission on Windows Server
Step 2: Add the User to Remote Desktop Users
Click on the Groups option and Select >>Remote Desktop Users
. Adding our newly created user to this Group will allow it to access the server via RDP.

Double click on the >>Remote Desktop Users>>option and click>>Add

Type in the username you created earlier in the >>Enter the object names to select>>box and click>> Check Names

Step 3: Test the new user
Disconnect from the server and login again with the newly created Username to check if everything is working okay.
Conclusion
Congratulations. You created a new user and gave it RDP permissions on your Windows Server 2019.